QMetry Test Management - Agile Implementation
Being Agile means adapting, collaborating, and delivering value continuously.
This Agile Implementation Guide demonstrates how organizations can leverage QMetry Test Management alongside JIRA to plan, execute, and track testing activities throughout the Agile lifecycle. Using FitTracker as an example, this guide provides a practical framework for establishing an effective Agile testing process.
Product Teams
FitTracker follows the Scrum framework and uses JIRA for project management.
Project | Description |
|---|---|
FitTracker Watch | Smart watch hardware design and development |
FitTracker Firmware | Firmware development and testing |
FitTracker Web Application | Customer web portal |
FitTracker iOS App | iOS mobile application |
FitTracker Android App | Android mobile application |
Agile Implementation in QMetry
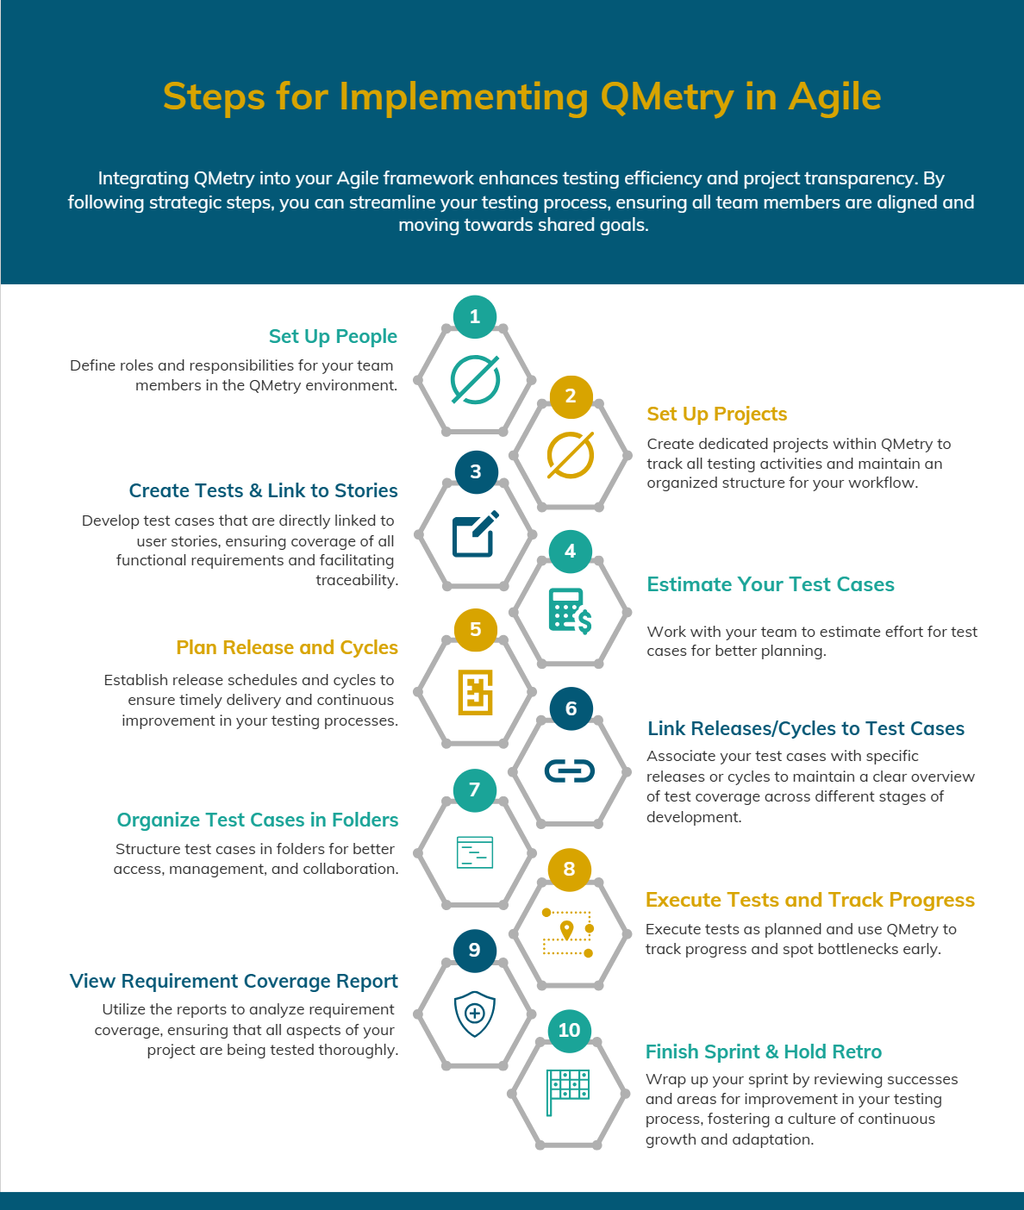
Step 1: Set Up Users and Roles
Before configuring projects and test assets, ensure all users can access QMetry through your organization's preferred authentication method.
Authentication options
LDAP Authentication
Single Sign-On (SSO)
QMetry Native Authentication
To maintain clear ownership and security, define role-based permissions.
QA Professional: Create and Maintain Test Cases, Test Suites and Defects.
Developer: Create and Maintain requirements and Defects, while view Test cases and Test Suites.
QA Manager: Can do what QA Professional and Developer can do, for given project.
Program Manager: Can do what QA Manager can do, for multiple projects.
Admin: Has rights to create projects and perform other administrative tasks that could potentially impact whole QMetry Instance.
Resources:
To set up user refer to User documentation.
To set up roles refer to the Roles documentation.
Step 2: Set Up Projects
Project structure plays a critical role in maintaining traceability and simplifying integrations.
Note
If you are using JIRA and plan to integrate JIRA with QMetry, we strongly recommend to use same project structure as JIRA. This way syncing of issues with JIRA will be extremely simple.
For FitTracker, create the following projects:
FitTracker Watch: Smart watch hardware design and development.
FitTracker Firmware: Smart watch firmware development & testing
FitTracker Web Application: Web Portal.
FitTracker iOS App: iOS app
FitTracker Android App: Android App
Maintaining identical project structures ensures consistent visibility across requirements, test cases, executions, and defects.
Resources
To set up project go to the Manage Project documentation.
To set up Release & Cycle refer to the Manage Release and Cycle documentation.
Step 3: Create Test Cases and Link Them to User Stories
Go to Test Case module and start writing test cases. Document Test Steps, Test Data, and expected outcome. Attach screen shots or other material as supplement to test case.
Link Test Case to Stories. In our example, we have integrated QMetry with JIRA. QMetryautomatically syncs requirements from JIRA to QMetry and keep them up to date.
Note
Linking test cases to Stories is a good practice to determine test coverage and produce more meaningful reports.
Resources
To create test case, refer to the Create Test Case documentation.
To link Requirement to Test case, refer to the Linking Requirement to Test Case documentation.
Step 4: Estimate Test Efforts
To estimate, how much can you really test in each sprint, it’s important to estimate each test case. Estimation is optional, if done, could be helpful in reporting.
QMetry currently supports estimation in Hours. However, you can use point based or any other estimation technique as far as its numeric to match with your estimation technique in JIRA.
Step 5: Plan Release and Sprint Cycles
In each project, you can define Release and Cycles (a.k.a. sprints). Releases and Cycles can have start and end dates. Each release can have multiple Cycles/Sprints.
Step 6: Associate Test Cases to Releases and Cycles
Depending on scope of your stories in a specific sprint, you can move corresponding Test Cases to same release/cycle(sprint). Linking of Test Cases to Sprint can be done from multiple places including Test Cases or Test Suites.
Step 7: Manage Test cases under folder hierarchy, track execution for builds.
Manage all your Test cases under folder hierarchy. Create folders as name of your Release and Cycle. Group subfolders with the name of components/features.
Release Name is Avengers, Sprints are Avenger 1, Avenger 2 etc., Components are Walk, Run, Yoga etc. Folder structure should be defined as.
Avengers > Avenger 1 > Walk
Avengers > Avenger 1 > Run
Avengers > Avenger 1 > Yoga
Avengers > Avenger 2> Walk
Avengers > Avenger 2 > Run
Avengers > Avenger 2 > Yoga
Create build number as per your development cycle, assign test suite executions to a build and execute them. The build reports will provide build summary of the executions done for it.
To create test case folder, refer to the Basic Folder Operations documentation.
Step 8: Hold your Daily Standup Meetings.
Create Test Suites for all test Cases that are part of current sprint. Depending on platforms, invite Testers to execute tests and fill results. This is also a good time to log new defects as discovered during test execution.
If your team does automation, this also good time to setup Jenkins/Bamboo integration to bring automation results inside QMetry. This way we can get comprehensive view of manual and automated testing.
Discuss progress in daily standup meeting, and re-assign test executions as required.
Step 9: View Requirement Coverage Report.
Requirement Coverage report gives you 360-degree view of manual and automation testing. For the given scope of sprint, Coverage report, determines how much test coverage is present. Within what is covered, how many tests have been executed; with in what is executed, how much has passed Vs failed.
Coverage report also shows defects identified during testing, their priority and current status. This makes it really simple for executives to make informed go-no-go decision after reviewing manual and automated test coverage, test results along with defect status and severity.
To view executive coverage report, refer to the Requirement Report documentation.
Step 10: Complete the sprint and hold retrospective.
As you complete the sprint, discuss what worked and what did not work. Use top defects report to identify areas where maximum defects came from. Use Traceability report to identify patterns and relationship between defects, requirements and test cases.
Once you close the sprint, your stories may evolve for next sprint. Let’s say for "Login" story, in next sprint we will support "Login via mobile phones". In this case you can create a new version of Login Test Case without impacting older version or test results. And link new version of login test case with enhanced login story.