Manage Fields
Use the Manage Fields screen to create, edit, and delete user-defined fields (UDFs) and to configure system-defined fields across QMetry modules. The screen has two sections:
User Defined Fields (UDFs): Custom fields that you can create and add to one or more modules.
System Defined Fields: Predefined fields you can configure but cannot delete.
Creating New UDFs
Note
You need Manage Field Modify permission to create UDFs.
To create a new UDF, perform these steps:
 |
 |
Go to Customization and select Manage Fields.
Select New.
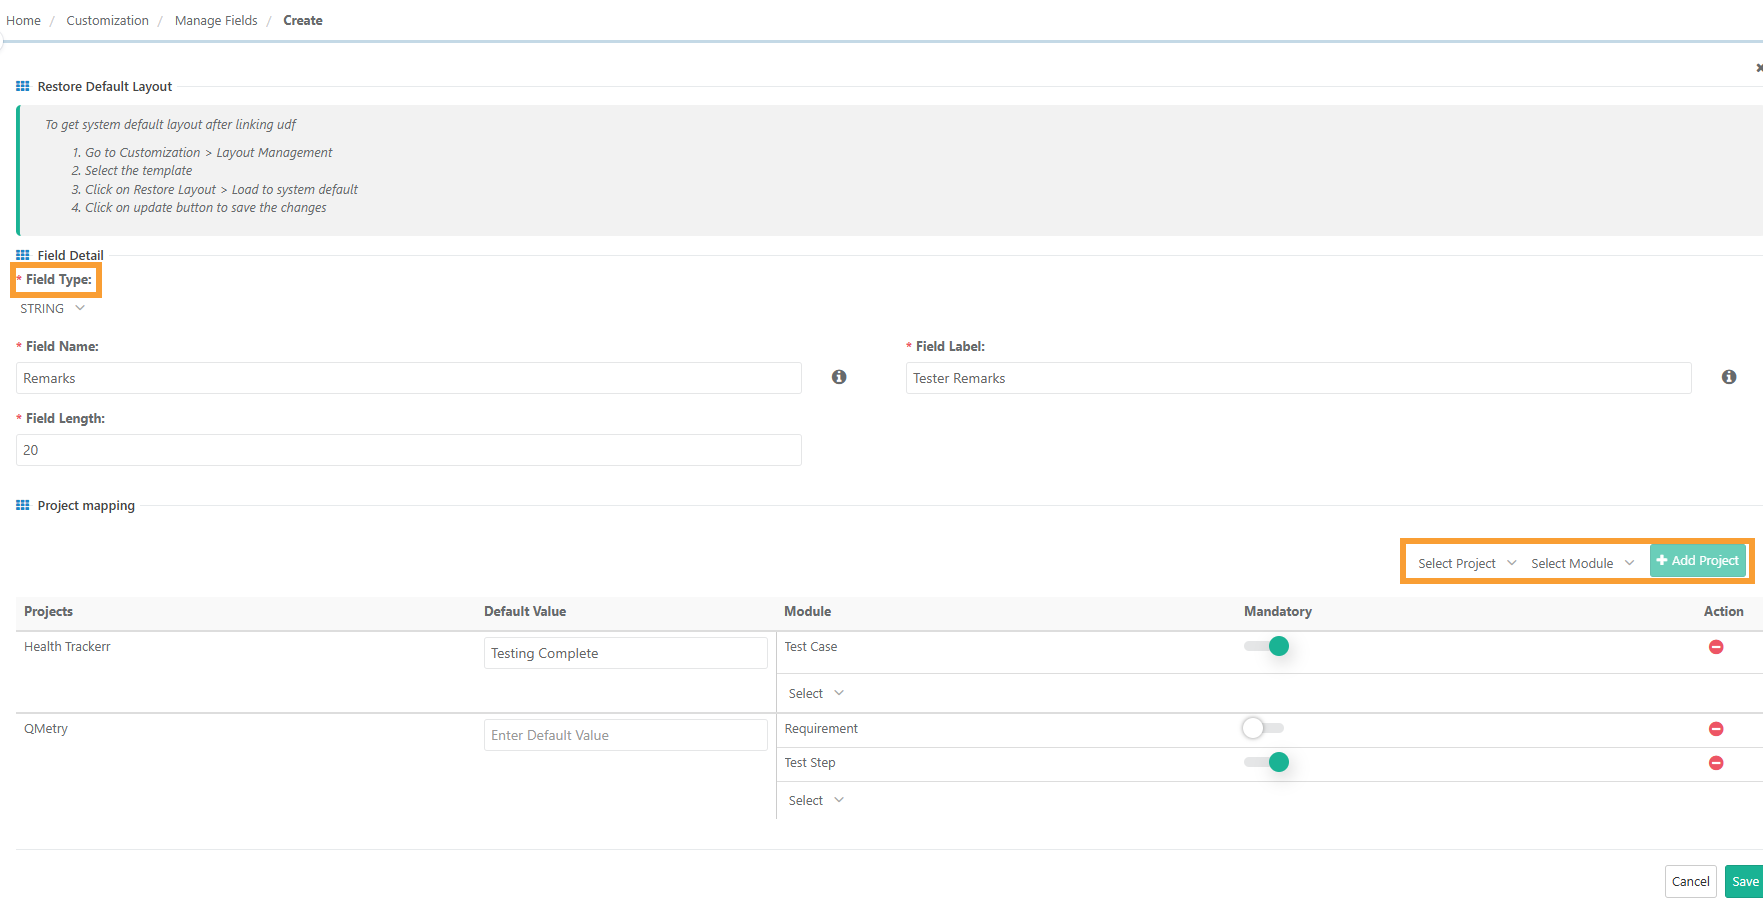
Fill in the field details. Refer to the following table for descriptions.
Table 64. Creating UDFField
Description
Field Type
The data type for the field. You can add the following data types.
String
Large Text
Lookup List
Multi-Select Lookup List
Cascading List
Number
Date Time Picker
Field Name
A unique ID that remains same across projects.
Maximum 50 characters.
Cannot change after creation.
Field Label
The display label that users see.
Max 100 characters.
Can edit after creation.
Field Length
Available only when the field type is String. Sets the maximum number of characters. The limit is 255 characters.
Project
The project to associate with this UDF. You can add more than one project.
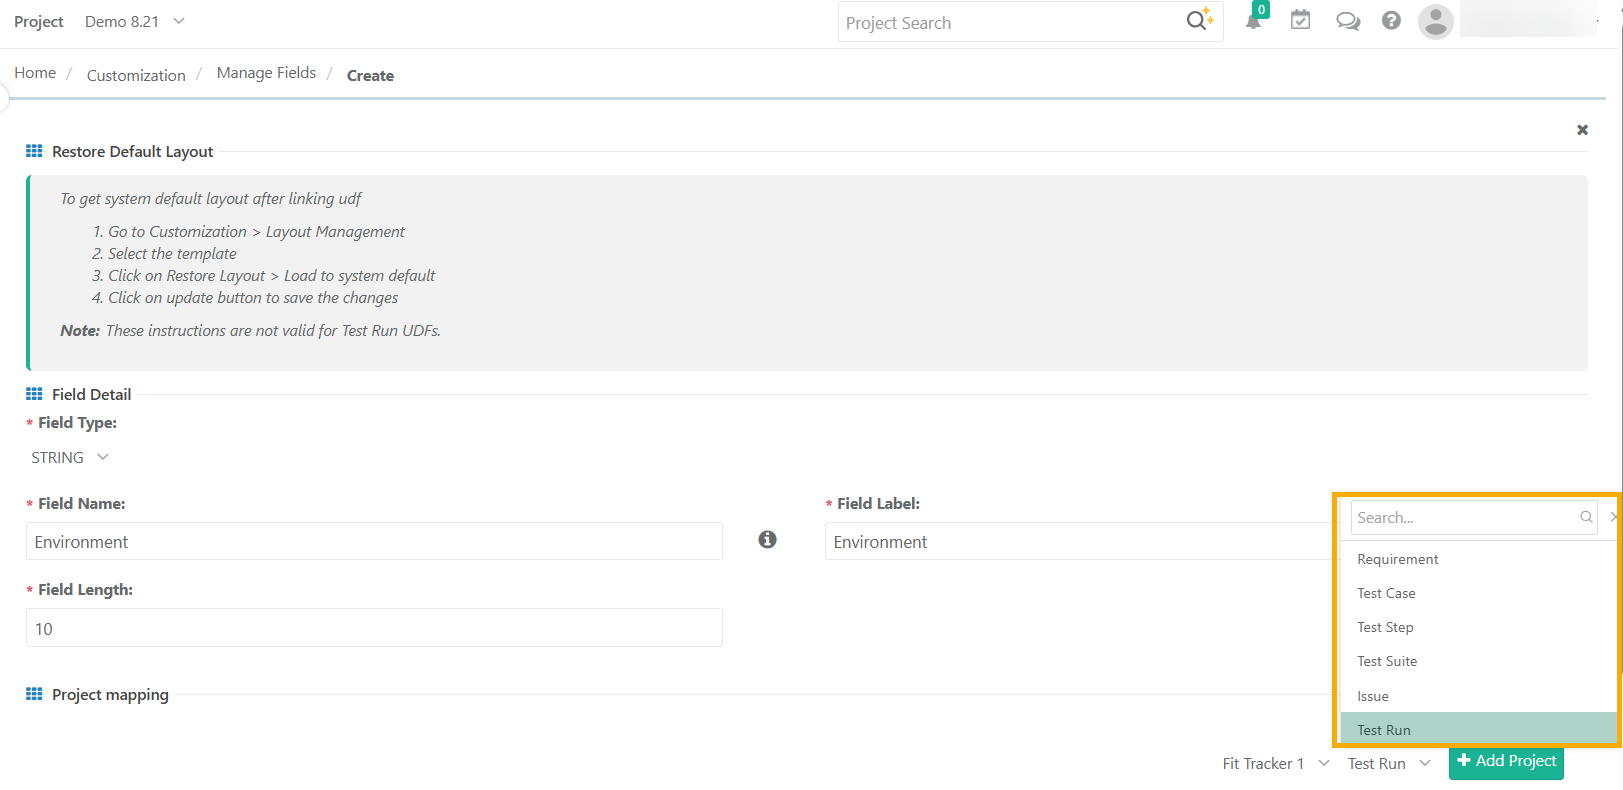
Module
The module this field belongs to.
Select Add Project.
Set a Default Value for the UDF. This value auto-populates the field each time someone creates a new entity in the associated module.
Select Save.
QMetry adds the new UDFs to the Default Section of the module layout, if Layout Management is enabled.
Note
Before creating UDF, check existing UDFs to avoid duplicates.
Cascading list fields apply only to the project in which you create them. You cannot copy or move cascading fields and their values to other projects.
Custom reports include only non-cascading fields.
Cascading lists aren't supported for Automation API or test cases created using BDD Import/Create.
Editing Existing Fields
You can edit existing UDFs to change the field label, field length, and project mapping. The field type and field name remain non-editable.
To edit an existing UDF, perform the following steps:
Go to Customization and select Manage Fields.
Find the UDF in the list and select Edit in the Actions column.
Make your changes and select Save.

Project Mapping
UDFs are mapped to specific projects. A UDF only appears in the modules of projects it is mapped to.
Adding a Project Mapping
To add a project mapping, perform these steps:
Edit the UDF.
In the Project Mapping section, select Add Project and select the target project.
Select Save.
Removing a Project Mapping
Note
Test Run module: Removing a project mapping for the Test Run module permanently deletes all execution data associated with that field for the project. This action is irreversible.
To remove a project mapping, perform these steps:
Set your current project to the project you want to remove.
Edit the UDF.
In the Project Mapping section, select the Delete icon next to the project
Note
All associations and disassociations of UDFs with projects and modules are recorded in the Admin Audit Log.
Sharing UDFs Across Projects or Modules
You can share a UDF across multiple projects or modules from the Add or Edit screen in Manage Fields.
Note
To use a UDF in a project, you must map the field to the projects.
You can map only projects that you have access to.
To share fields across projects or modules, perform these steps:
Go to the Customization and select Manage Fields.
Select New to create a UDF or Edit to update an existing one.
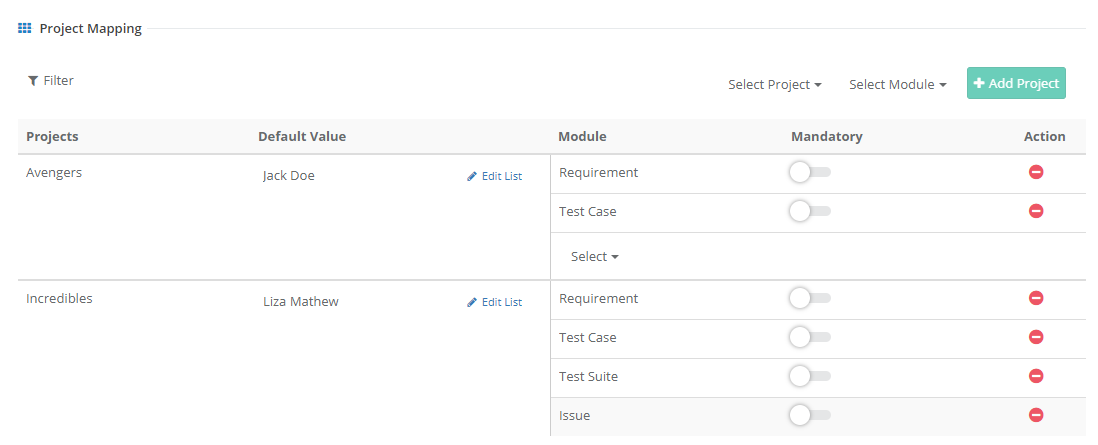
In the Project Mapping section, select the projects where you want to use the UDF and select Add Project.
In the Module drop-down, choose the modules to map the UDF to.
Select Save.
For Lookup List, Multi-Select Lookup List, or Cascading List fields, QMetry maintains the list values separately for each project. You can edit the list or set default values per project.
 |
Marking Fields as Mandatory
Note
You need Customization View and Modify permissions to set fields as mandatory.
Fields with a grey background aren't editable.
Test Run UDFs cannot be configured as mandatory fields.
Project admins can set both system-defined and user defined fields as mandatory.
To mark a field as mandatory, perform these steps:
Go to Customization and select Manage Fields.
Expand User Defined Fields or System Defined Fields.
Find the field and select Edit in the Actions column.
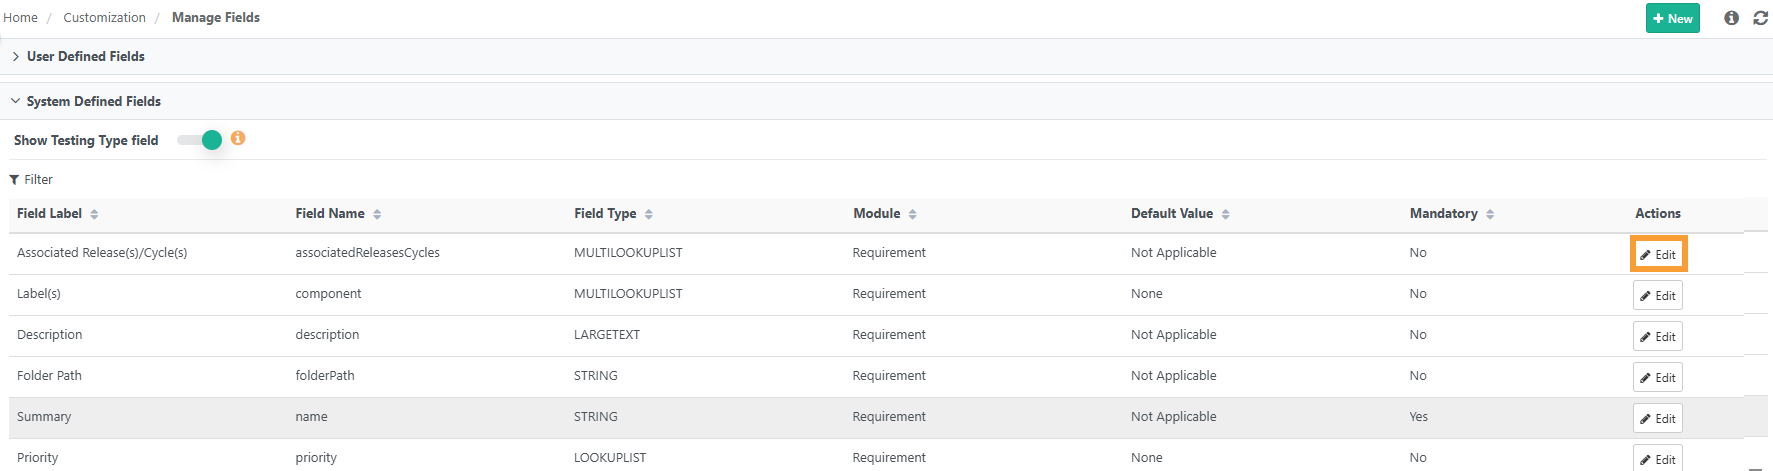
Turn the Mandatory toggle On.
Select Save.
You can configure the mandatory setting separately for each module and project.
Show Testing Type Field
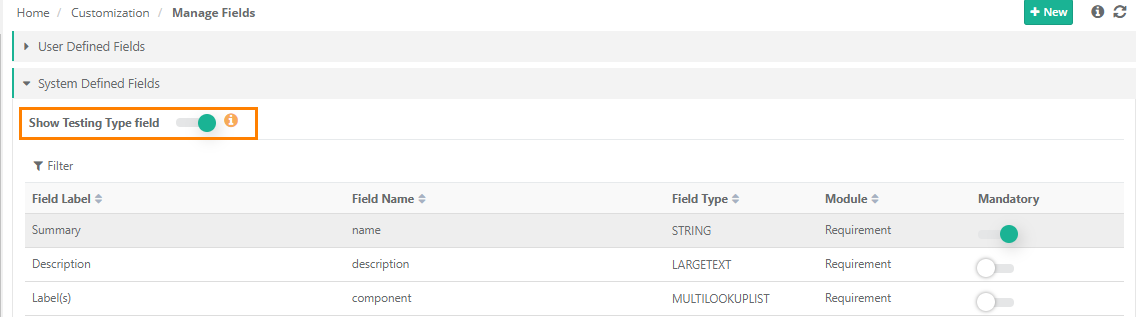
Use the Show Testing Type toggle on the Manage Fields screen to show or hide the Testing Type field across the application. The toggle is On by default, which makes the field visible in the Test Case grid and column list.
If the Testing Type field is part of any saved filters, those filters are cleared automatically when you change the toggle.
Note
This setting doesn't affect Dashboards or Reports.
The Testing Type field remains visible in Dashboards and Reports even when the Show Testing Type is off.
Defining Default Values
A default value auto-populates a field when someone creates a new record. You can set default values for both system-defined and user-defined fields at the project level.
Note
You need Customization View and Modify permissions to add default values.
You can't set default values for LARGE TEXT or DATE TIME PICKER fields, or for the Associated Release(s), Summary, and Testing Type fields.
To set a default value, perform the following steps:
Go to Customization and select Manage Fields.
Expand System Defined Fields or User Defined Fields.
Select the Field Label and select Edit in Actions.
Set the default values.
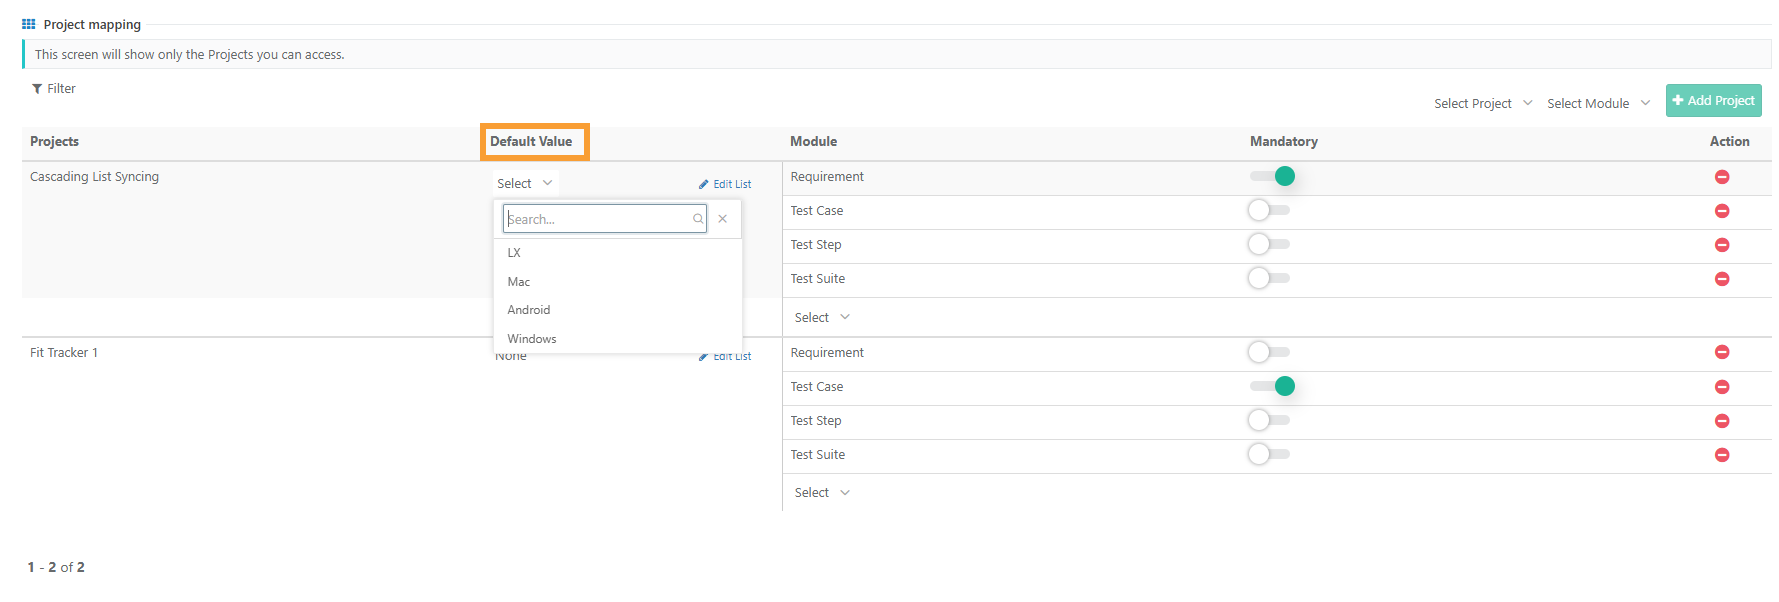
For Lookup List, Multi-Select Lookup List, or Cascading List fields, select a value from the list. List values are maintained per project, so the default value for the same list can differ across projects.
For all other field types, enter the value directly in the input box.
Select Save.
Copying List Values to Other Projects
You can copy the Field List Values from the current project to other projects. The table below shows the permissions required for each project role.
Source/Destination Project | Permissions |
|---|---|
Source Project | Project View and Customization View. |
Destination Project | Project View and Customization View and Modify. |
To copy list values from other projects, perform these steps:
Go to Customization and select Manage Fields.
Expand System Defined Fields.
Find the label to update and select Edit under Actions column.
In the Project Mapping section, select Edit List.
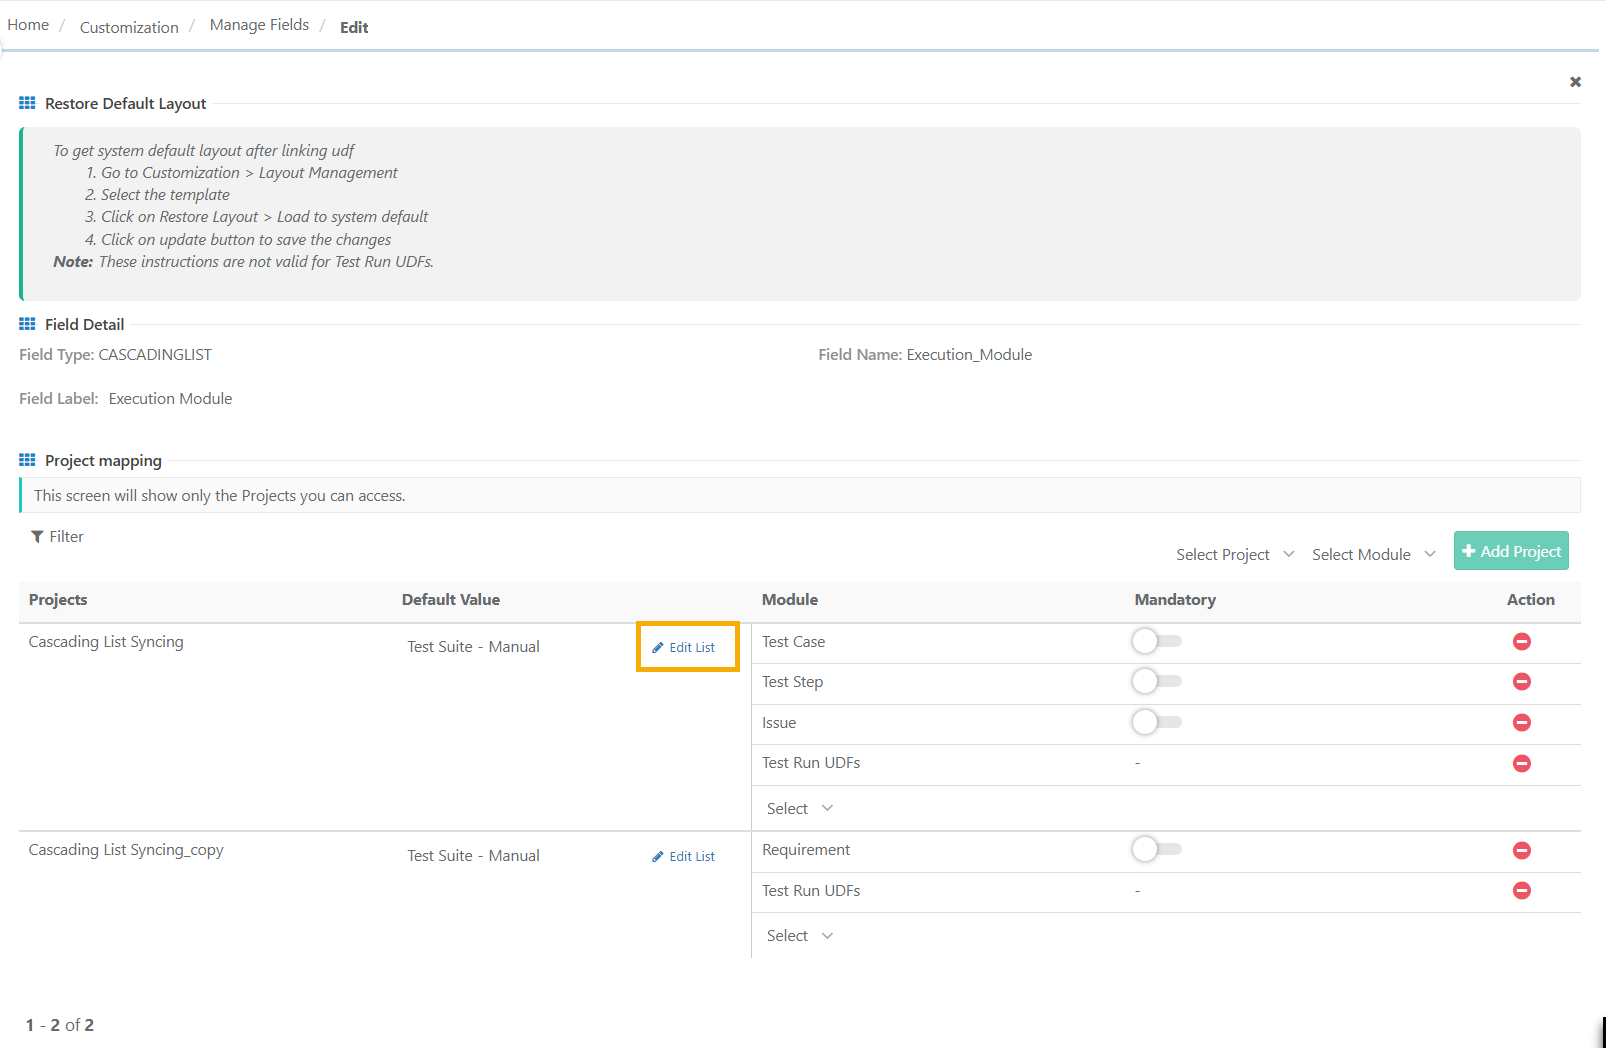
Select the list values to copy. You can select a maximum of 100 list values at a time.
Select Copy and choose the destination projects.
To check the copy progress, go to Scheduled Tasks under Notifications.
Importing List Values from Other Projects
You can import field list values from another project to reuse existing data. The table below shows the required permissions.
Source/Destination Project | Permissions |
|---|---|
Source Project (where list values will be modified) | Project View and Customization View. |
Destination Project (where values are copied from) | Project View, and Customization View and Modify. |
To import list values from another project, perform these steps:
Go to Customization and select Manage Fields.
Expand System Defined Fields.
In the Actions column, select Edit for the field you want to import list values into.
In the Project Mapping section, select Edit List.
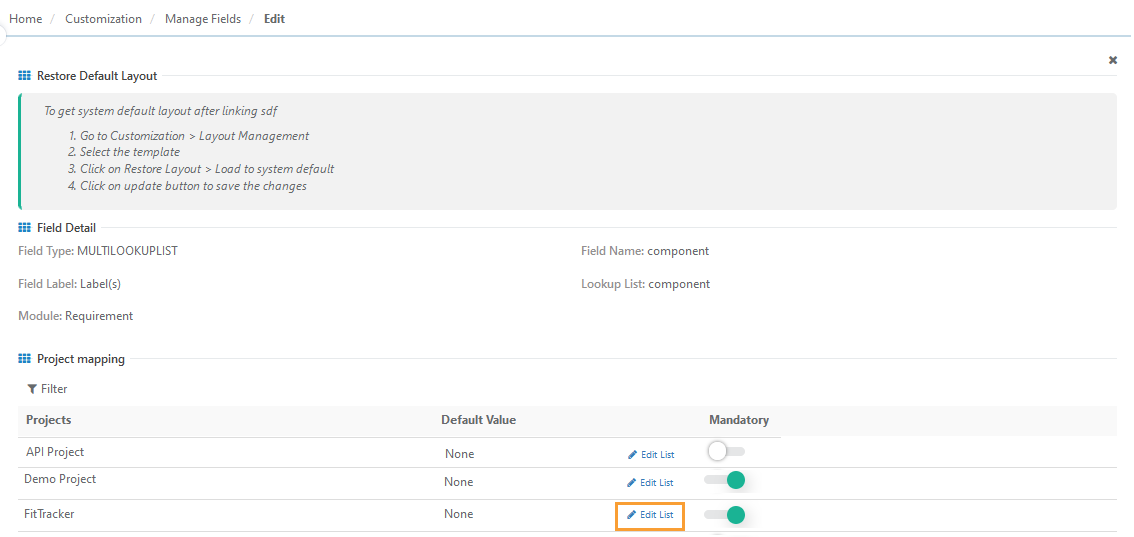
Select Import.
In the drop-down, select the project to import the list values from.
Select the values you want to import, then select Import. You can select a maximum of 100 list values at a time.
Deleting UDFs
You can delete a UDF only after you remove all its project associations. Once deleted, the UDF and all its data across all associated projects and modules are permanently removed and cannot be recovered.
Note
Deleting a UDF is permanent and not recoverable. Remove all project associations and confirm the field is no longer in use before you delete it.
To delete a UDF, perform these steps:
Remove all project associations from the UDF. For instructions, see Removing associations below.
Go to Customization and select Manage Fields.
Hover over the UDF and select the Delete icon.
Confirm and delete.
Note
You can only delete user-defined fields. System-defined fields don't have a Delete option.
If the UDF is a Lookup List or Multi-Select Lookup List type and is deleted, all values assigned to entities in the associated project become None.
The Manage Fields and Delete options are only available if the Customization package is enabled on your QMetry instance.
Removing Associations
Removing a UDF's association with a project deletes all values for that field in the project's test assets. The deletion is permanent.
To remove a UDF association, perform these steps:
Set your current project to the project you want to disassociate the UDF from.
Go to the Customization and select Manage Fields.
Find the UDF and select Edit.
In the Project Mapping section, select the Delete icon next to the project.
Repeat these steps for each project the UDF is linked to. Once all associations are removed, you can delete the UDF.
Note
For the Test Run module: removing an association permanently deletes all execution data linked to that UDF for the project. This action is irreversible.